When conducting and undergoing the Biological Age test we can be overwhelmed by the fact that in a while we will get to know how old we really are. Due to this, we may tend to hurry up or not pay attention to the way we perform some tests. But this can give us biased results.
That’s why a set of rules should be followed so that the results remain consistent and accurate. It is important to stick to an appropriate order of tests outlined in this article. Plus, if you cannot meet the requirements, you can still continue with the tests, however, make a note of the deviations from the ideal parameters.
Step 1. General information
We collect general information about a participant / client.
Data collected:
-
Name. We need it to personalise the communication in a biological age report.
-
Email address is needed for sending a biological age report (a copy will be sent to a coach performing the test).
-
Biological gender – male or female. It’s an important information because some of the indicators are gender-related.
-
Date of birth
-
Height
-
Weight
Step 2. Cardiovascular fitness: VO₂ Max
When measuring VO₂ max, we are obtaining it from the resting heart rate of a client or fitness device.
Process:
1. Before conducting the test, the client must remain seated for at least 3 minutes.
2. The client has to remain seated during the test.
3. Ten to twenty-five degrees Celsius is the ideal range for room/air temperatures for the test.
Notes:
-
It is also possible to use the client’s VO₂ Max or resting heart rate from their smartwatch.
-
The result may vary if the conditions differ from those listed above.
Step 3. Mobility & core stability: Shoulder mobility
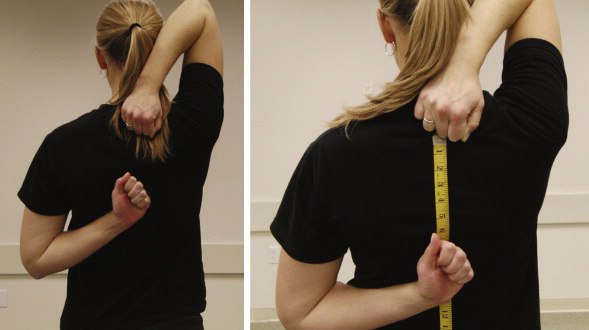
When obtaining the client’s shoulder mobility, we take the measurements of both shoulders and use the lowest score for the final result.
Process:
1. Measure the client’s right hand from the distal crease of the wrist to the longest digit to determine hand length.
2. Make sure that bulky clothing is removed.
3. The client is to clench a fist in each with the thumb tucked away.
4. With feet together and standing upright, ask the client to reach one hand behind the neck and one hand behind the back trying to move fists as close as possible to each other.
5. Measure the distance of the two closest points of the fists.
6. If there is a loss of cervical spine position, repeat the verbal instruction to ‘stand tall’.
7. Ask the client to make 3 bilateral attempts and take the nearest score for each side.
Score:
4 = The closest points are less than 1 hand’s length
2 = The closest points are within 1.5 hands’ length
0 = The closest points are greater than 1.5 hands’ length
Step 4. Mobility & core stability: Low plank
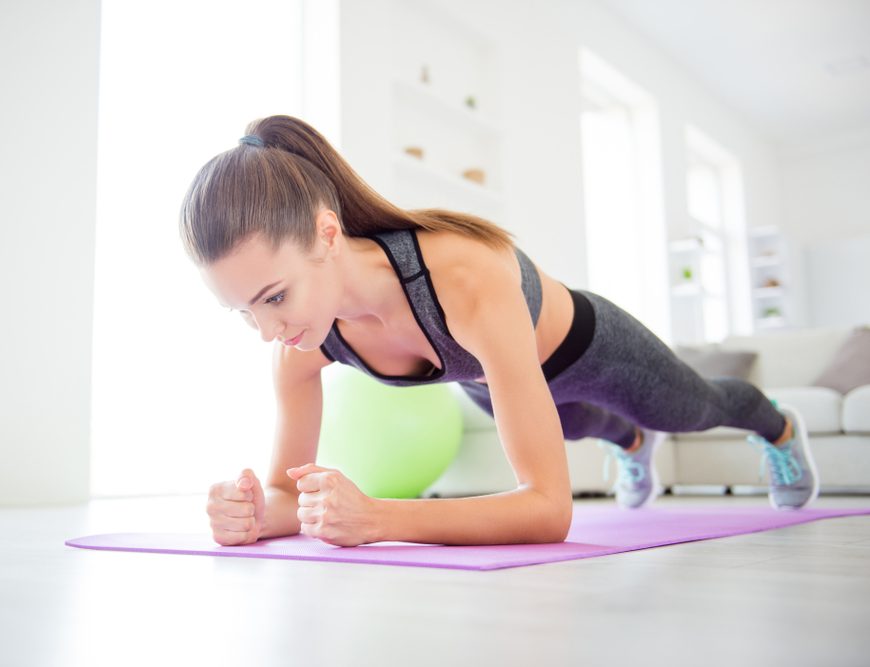
The low plank tests the client’s core strength.
Process:
1. On a flat, comfortable surface, ask the client to adopt a position on the floor where their forearms are placed on the floor and are flexed at 90 degrees at the elbow with the upper arm remaining vertical to the floor.
2. In a straight body position, the client engages their core to maintain a flat back while ankles are dorsiflexed at 90 degrees.
3. Time how long they can hold this position.
Notes:
-
Placing a knee down or breaking this position results at the end of the time recorded.
-
Elbows and forearms must remain on the floor at all times.
-
The back must remain straight and horizontal to the floor.
Score:
4 = Greater than 60 seconds
2 = 30 to 60 seconds
0 = Less than 30 seconds
Step 5. Mobility & core stability: Deep squat
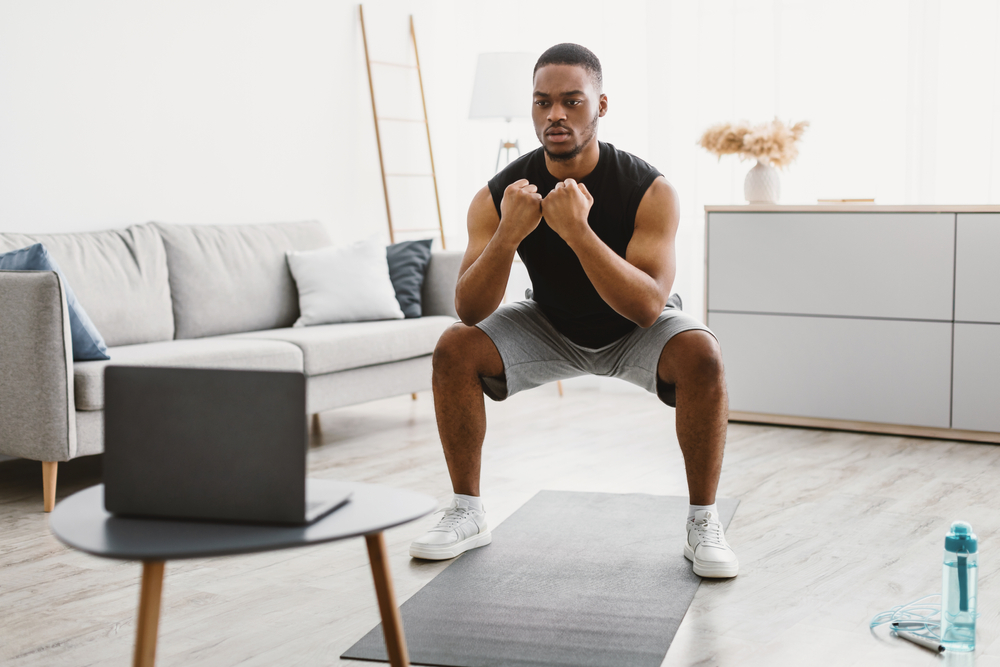
The deep squat measures the ability to perform triple flexion of the hips, knees and ankles. This will show overall lower body mobility whilst maintaining heels on the floor and arms parallel to the floor.
Process:
1. On a flat, even surface, ask the client to squat as low as possible whilst keeping their heels on the floor and arms extended parallel to the ground.
2. Give the client three attempts and take the best score.
Notes:
-
Heels coming off the floor or arms not remaining parallel to the floor result in a failed attempt.
-
Obtain the best score before either of these two things happens.
Score:
4 = Tighs below parallel
2 = Thigh parallel
0 = Thigh above parallel
Step 6. Body composition: Waist-to-Hip ratio
The waist-to-hip ratio is the ratio of the narrowest part of the waist (usually on or close to the belly button) and the widest area of the hips (usually the middle of the glues/backside). This ratio gives a good idea of a person’s body composition.
Process:
1. Ask the client to stand with their feet together and arms by their side.
2. Measure the smallest area of their waist under their clothes or over a thin top (usually on or just above the belly button).
3. Measure the widest area of their hips over thin trousers (usually the middle of the glutes/backside).
Step 7. Muscle strength: Grip
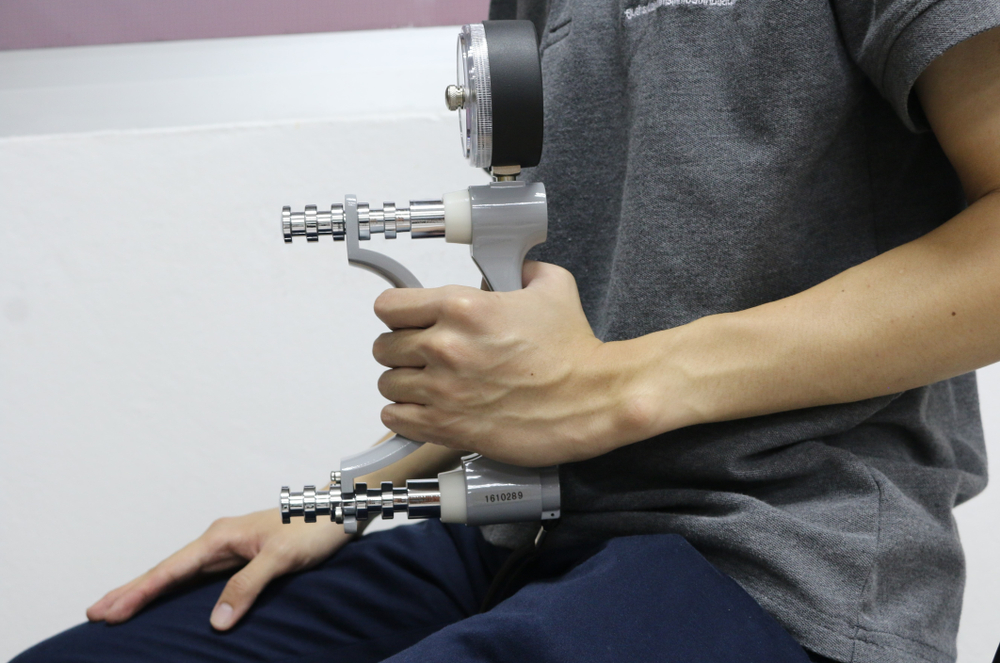
Grip strength is a key indicator of overall body strength. We take the measurement of both hands and establish the mean average for the final score.
Process:
1. Ask the client to stand with their feet together and arms by their side.
2. Ask them to flex the testing arm to 90 degrees at the elbow (to the front).
3. Pass them a hand dynamometer and ask them to squeeze as hard as they can while keeping the same hand position for 5 seconds.
4. Repeat with the other hand.
5. We recommend to do it two times at least.
6. Record the average of two attempts for each hand.
Step 8. Muscle strength: Push-up
The push-up test is a measure of upper body strength. This test is to be performed last as it is the most physically demanding.
Process:
1. Ask the client to complete a 1-minute warm-up of the upper body including air chest press, air shoulder press, forward and backward arm rolls etc. On the flat, stable ground, place a towel, cushion, yoga block or soft item measuring 3 inches (7.5 cm) on the floor.
2. Ask the client to adopt a high plank position with their hands under their shoulders pointing forwards. They should also have their legs and back straight, feet together and plantar flexed with the ankles at 90 degrees.
3. The client lowers their chest until their chest touches the object on the floor.
Repeat until the client can no longer achieve a full repetition or breaks the form (including knees down).
Note that modified push-ups (females) have the same start position, followed by lowering the knees to the floor in line with where they were when in the air (use a pole to check this position). The back must remain straight, feet together and plantar flexed with the ankles at 90 degrees.
Notes:
-
Repetitions that don’t meet the requirements of correct posture and the chest touching the 3-inch block aren’t to be counted.
-
If knees are dropped (male) then the test is over.
-
If the client pauses for more than 10 seconds at a time then the test is over.
Step 9. Enter the data, review generated report and add your comments
Now, after you’ve conducted all the tests, enter the data collected into the Biological Age ‘T&M Method’ Calculator and generate the results. Check the report and add your commentary for the client. Choose an option on when you recommend them to retake the test again.
Step 10. Send a reviewed report with your comments
The final step is the easiest one 🙂 Just click on the ‘Send Report’ button and check your inbox – the new report will be there in a matter of seconds. Now you can analyse the results together with your client and help them improve their health by adjusting the training program.
Let’s sum up
Conducting the Biological Age test is simple, however there are some rules to be followed by a coach and their client. It takes only 10 steps and 10 minutes. You can use Healthypedia’s calculator to enter the data and find out the results. If you are a professional coach and want to be a part of the Biological Age ‘T&M Method’ contact us at [email protected] and receive access to the calculator.

